
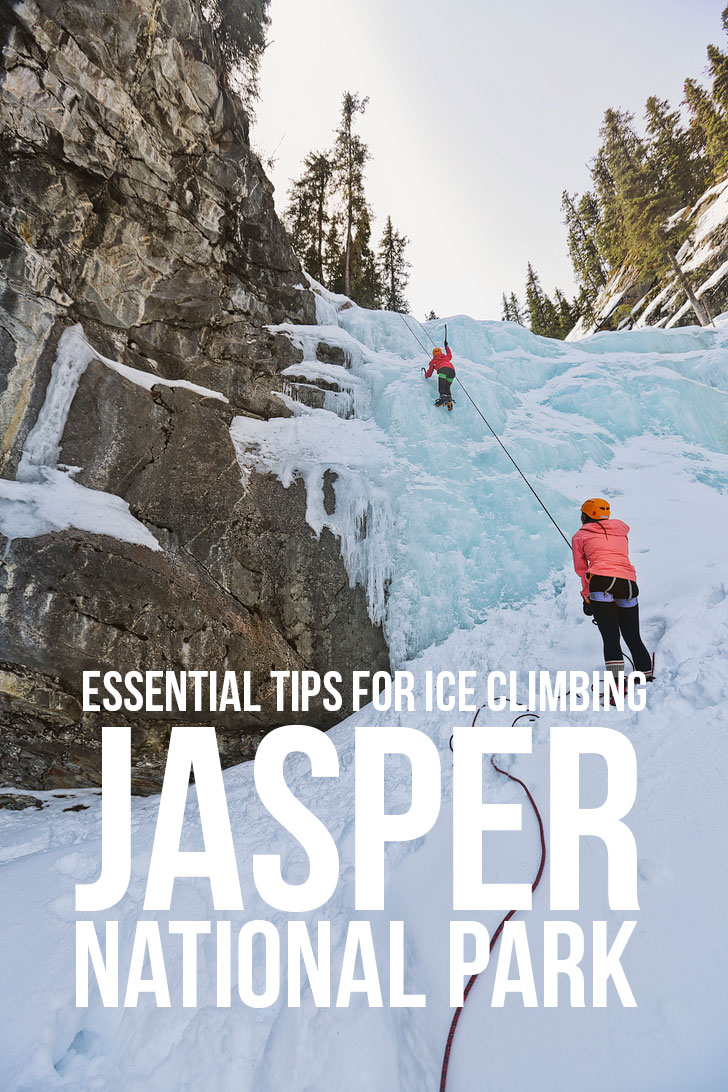
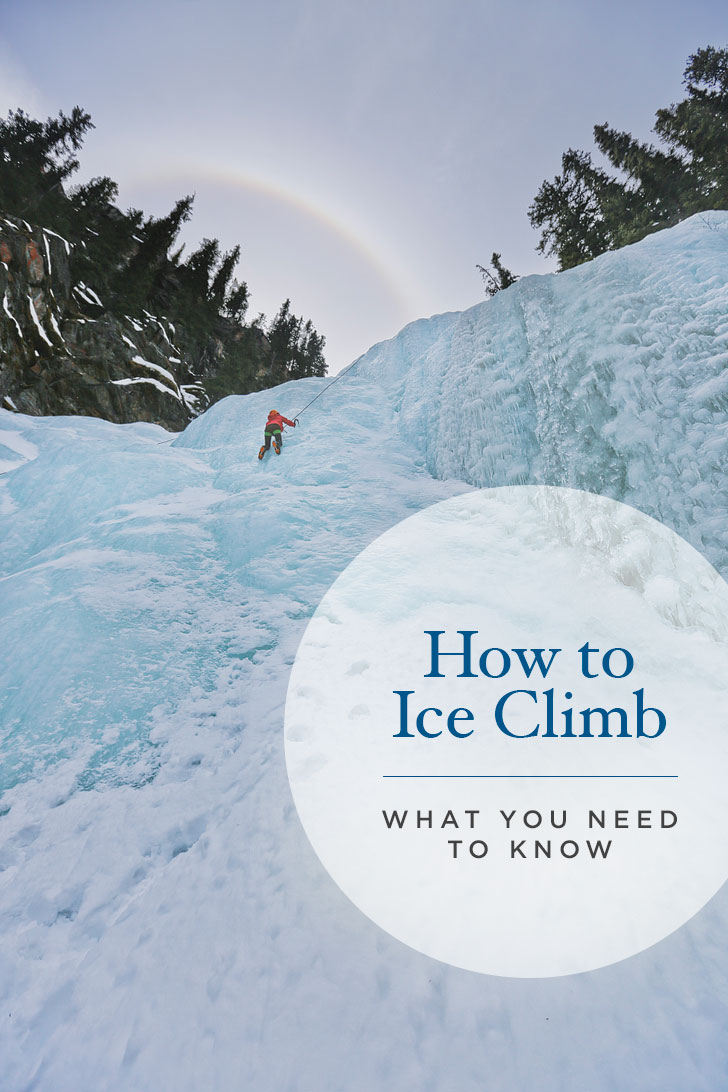
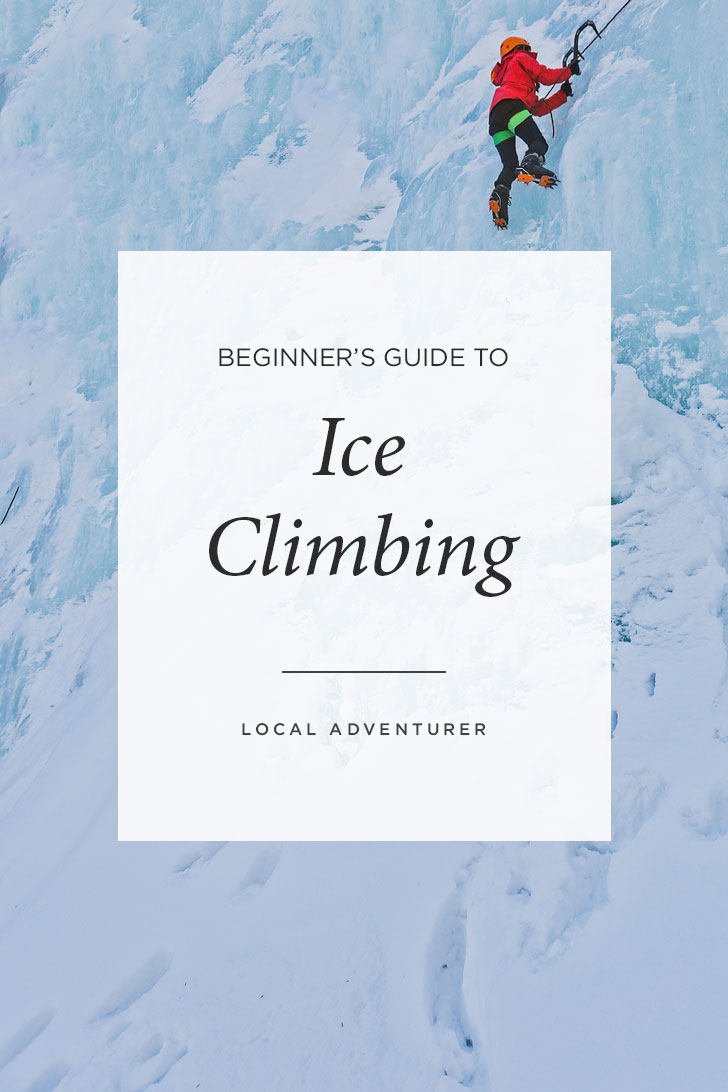
Want to try ice climbing? Here’s what you need to know.
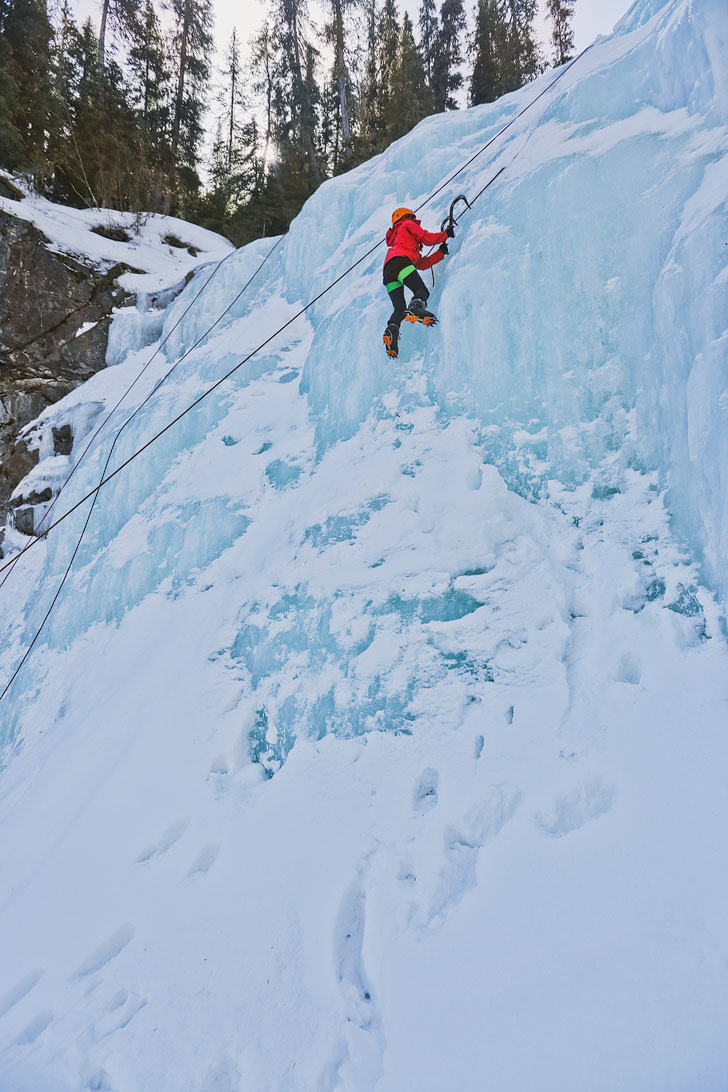
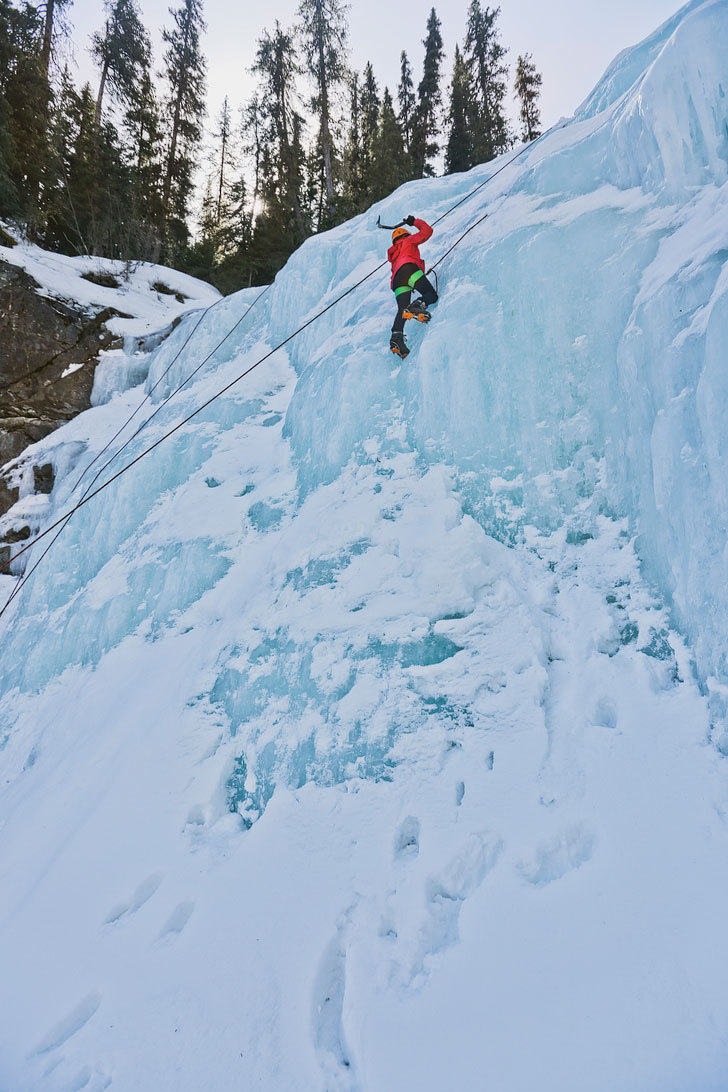
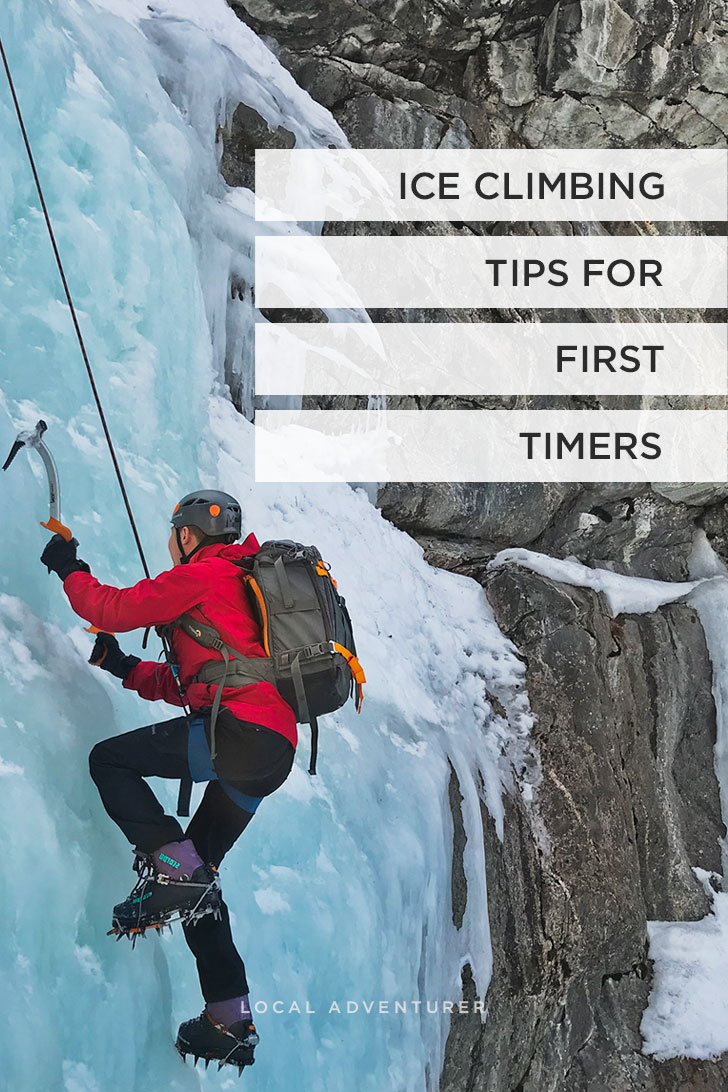
I glanced below and then back at the wall of ice, trying to stay focused on keeping my feet in front of me as I got lowered. Once I reached the bottom, I yelled, “Secure!” to let the belayer know I made it. I relaxed for a moment to get my bearings. Then my head craned all the way, now realizing how massive the climb was. I could hear the rushing water behind the thick ice wall before me. I tightened the grip on my axes, and after a few deep breaths, I yelled, “Climbing!”
Thank you, Tourism Jasper, for hosting our trip and Rockaboo Mountain Adventures for being our guides. All opinions are always our own. This post may contain affiliate links, where we receive a small commission on sales of the products that are linked at no additional cost to you. Read our full disclosure for more info. Thank you for supporting the brands that make Local Adventurer possible.
Last Updated: October 6, 2025
We had an epic four days in Jasper National Park! In four days, we rode a helicopter, went snowshoeing, rock climbed, ice climbed, and snowboarded. It was an amazing experience, and it’s easy to see why locals love April so much. At the turn of the season, you get the best cold and warm weather activities! As we were preparing for our trip, we were most excited about ice climbing since it would be our very first time. Firsts are always so special.
What is Ice Climbing
Ice climbing is exactly what it sounds like. It’s going up ice formations. Usually, it refers to features like icefalls, frozen waterfalls, and cliffs or rocks covered in ice.
There are two main types of ice climbing:
- Alpine ice is in mountainous environments and is usually part of an attempt to summit a mountain. The ice is frozen precipitation; typically, it’s part of a longer route.
- Water ice is usually found on a cliff or beneath other water flows. Usually, these are climbed for the technical challenge.
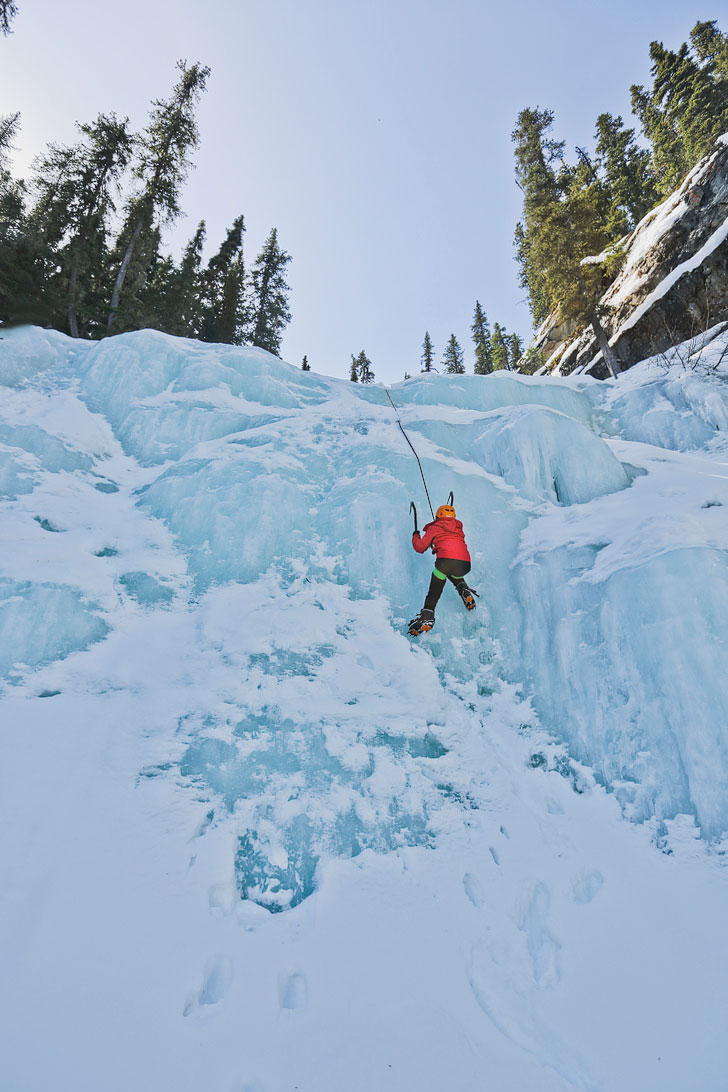
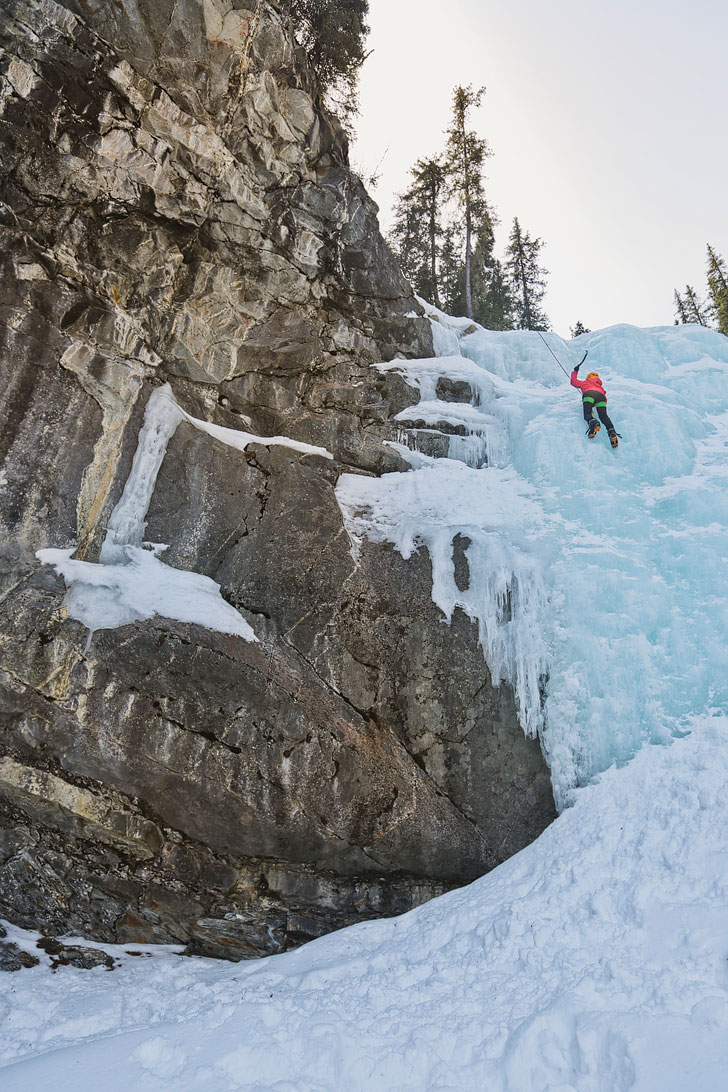
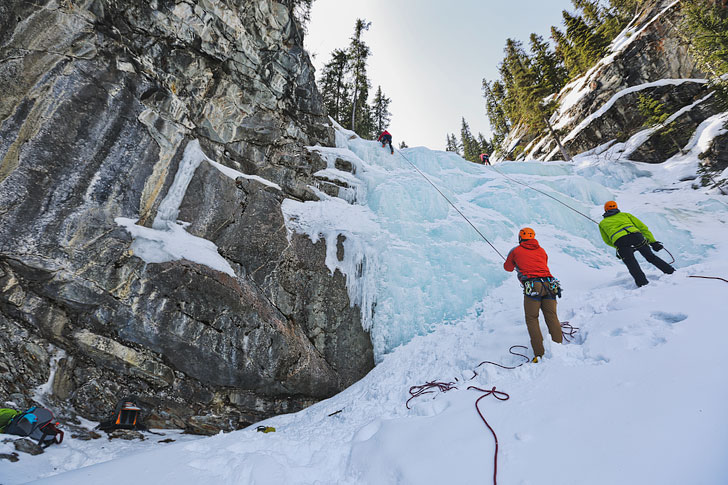
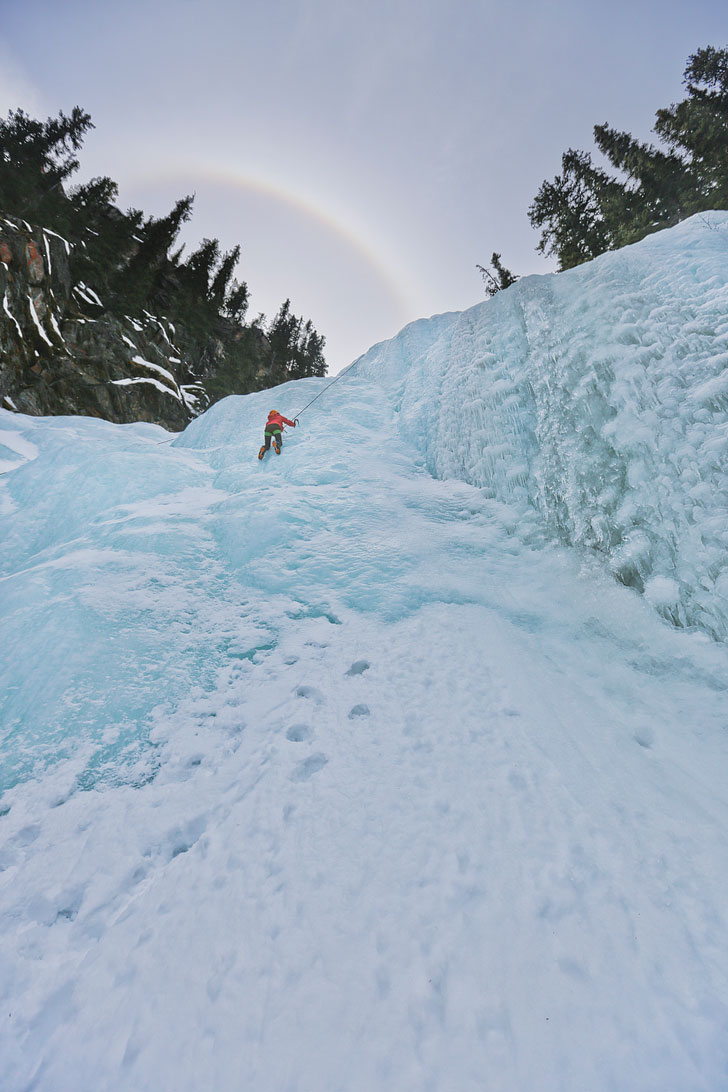
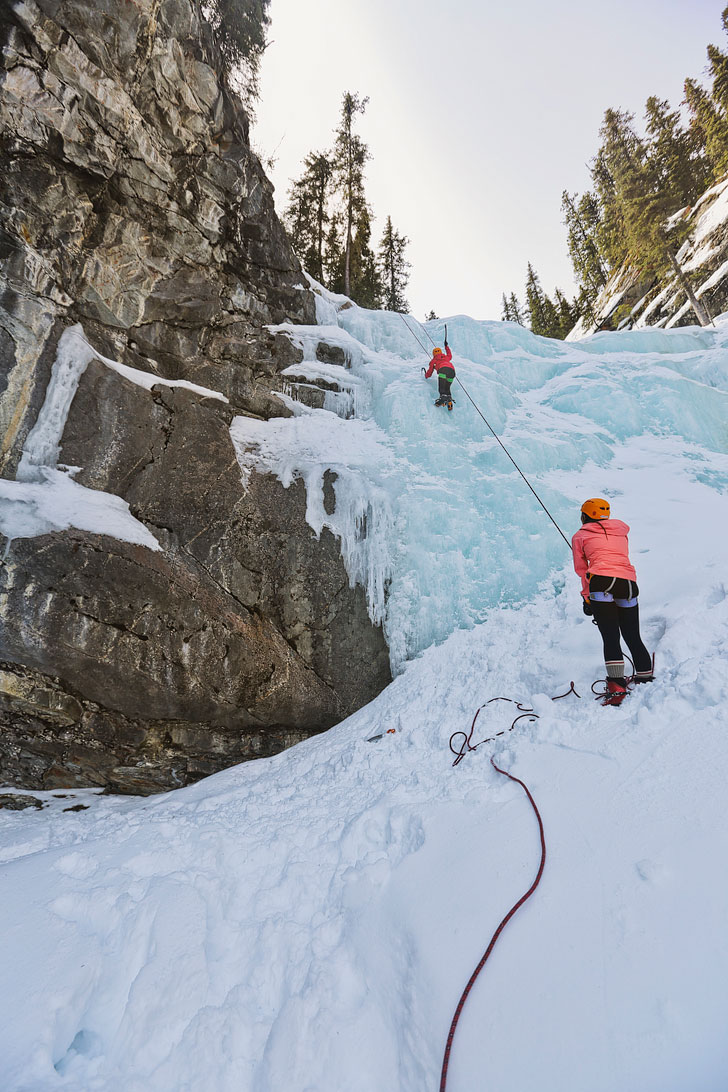
For our first experience, we went up water ice. It was an unnamed waterfall at Jasper’s Edge of the World, which is also a beautiful viewpoint that’s popular among locals.
See More: 15 Unforgettable Things to Do in Jasper National Park
Jasper National Park Ice Climbing & Best Time to Go
Ice climbers love Jasper National Park during the winter. There are a lot of different spots to climb for varying levels. Typically the ice is best between December and March but can start as early as November and run as long as April.
We decided to go in late April because we heard that it is the locals’ favorite season. The reason is you can ice climb and rock climb on the same day! Plus, if you hate the cold, the weather is starting to warm. Remember that the options are more limited but can be great for first-timers.
The initial plan was to go to Maligne Canyon, but the ice was already starting to melt there, so we headed to the Edge of the World instead. We got super lucky since we took a risk going on the last few days that you could possibly ice climb before the ice got too thin. The weather was sunny and warm, and the ice was still solid. You can’t ask for better ice-climbing conditions (in terms of comfort).
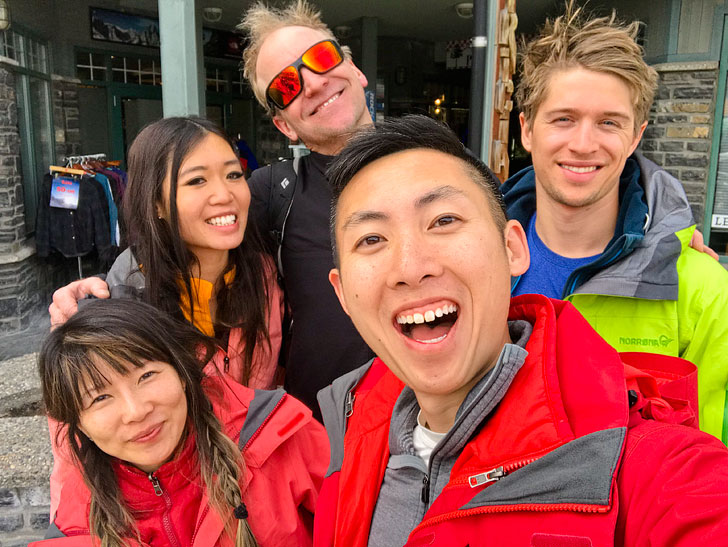
Deryl from Rockaboo Mountain Adventures was the best! It was so inspiring to learn that, at one point, he was the youngest Canadian to summit Everest.
Best Places to Ice Climb in Jasper National Park
- Maligne Canyon (Jasper, AB T0E 1E0, map)
- Edge of the World, Jasper National Park (52.802919, -118.077457, map)
- Tangle Falls Creek (Icefields Pkwy, Improvement District No. 12, map)
- Panther Falls (Improvement District No. 9, map)
- Weeping Wall (52.03659, -117.08007, map)
- More Jasper/Hinton Ice Climbing Routes
Ice Climbing Terminology & Grades
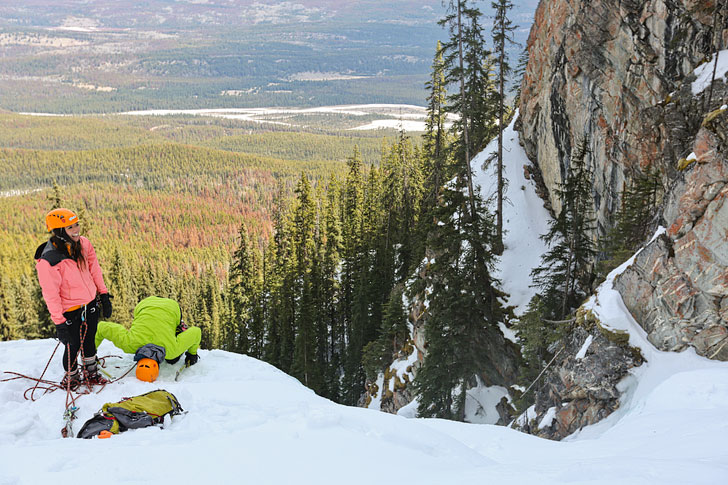
Let me start by saying you should go with a hired guide or an experienced friend if you’ve never been ice climbing. We went with Rockaboo Mountain Adventures, who helped us set up the anchor and taught us all we needed to know. But if you’re like me, I like to learn some basics before going.
Terminology
- Tying In – Attaching the rope to the harness in a particular way for either climbing (figure 8) or belaying (the belay device is clipped into your belay loop). If you’ve never done it, make sure someone is there to teach you. You also should always have someone double-check after.
- Belaying – The belayer is the person on the other end of the rope making sure you are secure if you slip while climbing. They can do this from the top or bottom of the wall.
- Leading – You will most likely not lead on your first trip. Leading is the act of climbing while putting in protection (screws into the wall) until he/she reaches the top of the pitch. At the top, they build a belay anchor.
- Lowering – When the belayer safely lowers you down a cliff. Sometimes you will be lowered first before climbing up the wall, other times you will climb up then get lowered back down.
- Abseiling / Rappelling – As opposed to being lowered, abseiling allows the climber to control the speed at which he/she descends on a rope.
Grades
There are slight differences in climbing grades, but this is a good general rule of thumb. You will most likely be on 2s and 3s for the first climb.
- WI2 – Low-angled (60 degrees) that can be climbed with one ax.
- WI3 – Mostly 6-70 degree ice with occasional near-vertical ice up to 4 meters.
- WI4 – Near-vertical ice up to 10 meters with mainly sustained climbing.
- WI5 – Near-vertical or vertical ice up to 20 meters with sustained climbing.
- WI6 – Vertical climbing for the entire pitch (30-60 meters)
We did a WI2 and a WI3, and this is how we all felt after we made it to the top.
What to Pack & Wear
If you go with a guide, they will most likely provide all the technical gear you need. We brought our own clothes and harness (since we have them from rock climbing), but otherwise, we used all of Rockaboo’s gear.
What to Wear
- Sunglasses – Neither of us brought sunglasses, but wished we did. It helps keep the ice out of your eyes when you’re on the wall, and the ice can get blinding on a sunny day. Be sure they are securely on you. These will help keep them secure.
- Waterproof Jacket – You are on ice!
- Waterproof Pants – Same concept as above.
- Waterproof Gloves – Appropriate weight depending on the weather. I used thinner, non-waterproof gloves to feel better, which worked out since the weather was nice and warm at the end of the ice-climbing season. Use waterproof if you’re going during their regular season.
- Insulated Layers – This depends on the conditions you are climbing in. We had warm weather (60s), so we only needed our waterproof shell.
- Warm Hat and/or Balaclava
- Waterproof Boots – if you want something more comfortable for the approach.
- Backpack – To store extra clothes, photography gear, and/or food. Waterproof if possible.
Technical Gear
- Mountaineering Boots – Fully insulated and waterproof boots. We switched to their boots before the hike to the waterfall.
- Crampons – Worn over your boots and used to dig your feet into the wall.
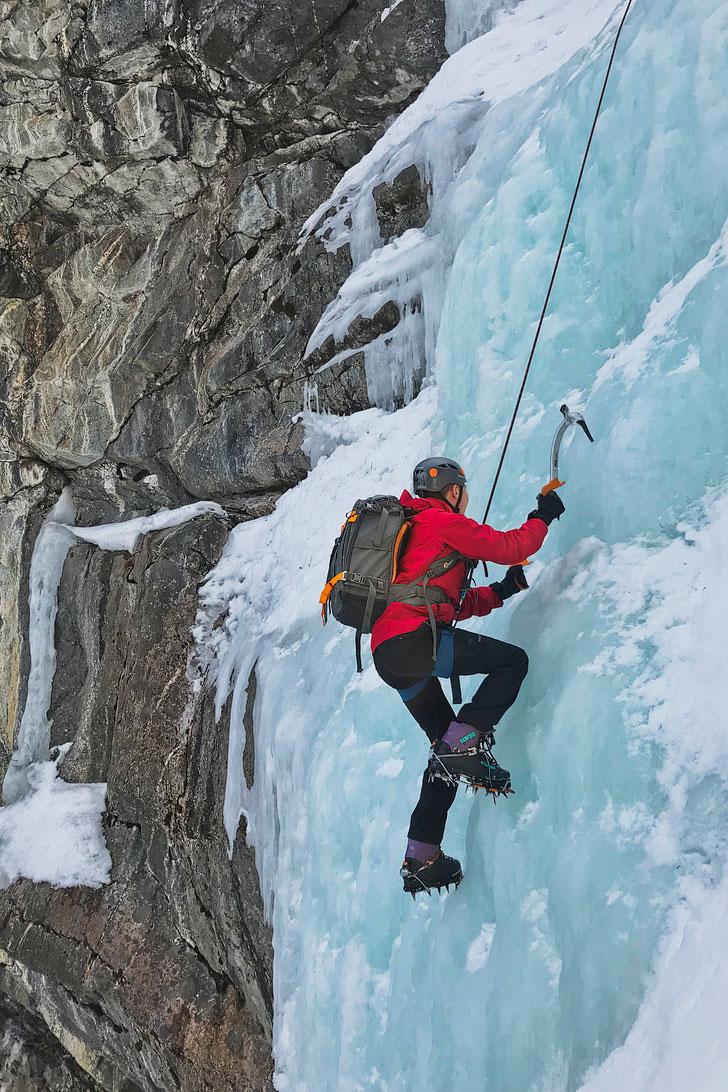
- Ice Axe – 50-65cm long axes used to ascend the wall. These are lighter and were easier to use for Esther.
- Climbing Harness (these are hands down the best harnesses, so we brought our own) – Like rock climbing, it’s worn to secure you to the rope as you are climbing and belaying.
- Climbing Helmet – It’s always good to keep a helmet on always, whether you are climbing or not. Chunks of ice will fall off the wall and come tumbling down. Bring your own if you don’t like using ones other people have used. In rock climbing, you typically yell if rocks come loose, but you don’t in ice climbing since it’s always happening.
- Belay Device – Different devices are available for belaying and abseiling. We like using the Grigri over ATC for extra security.
- Carabiners – Different types help create anchors and attach ropes at various points.
Photography Gear
This depends on the weather and situation, but we’ll share what we brought. Remember, whatever you bring, you must carry in and out. In our case, we lowered down before climbing back up. I had to climb back up with all our gear, which was an extra challenge.
- Backpack or Camera Backpack – We love our bags. Bring one that fits your gear and is secure. As you can see in the photo, I could secure it while climbing. I can also leave it on my hip to access my gear when needed. There is a rain fly if I have to put it down in the snow.
- Canon 5D Mark III
- 16-35mm Lens – Since you’ll probably be close to the waterfall, a wide lens will help you capture its sheer size.
- 100mm or 70-200mm – In case you want close-up shots of the climber.
- Tripod – We brought one with us just in case we were in a darker canyon but ended up having great light.
Snacks & Drinks
You’ll be out for at least half a day and must keep your energy up and stay hydrated.
- Lunch – We brought sandwiches, but they got soggy, so try to bring something that will hold up and be sure to put any sauces on the side.
- Snacks – Our go-to snacks are Built Bars and Stingers for outdoor activities.
- Water – Bring plenty of water with you. This SoftBottle is great since you can roll it up once you’re done. If you prefer to keep your drink insulated, pick up a Hydro Flask. See all our favorite travel water bottles here.
See More: Best Cameras for Bloggers – Your Essential Guide
Essential Tips for Ice Climbing
- Book your guide and let them know your skill level. Since we had some rock climbing experience, they could take us to WI3 climbs rather than starting us on WI2.
- The guide can provide you with all the technical gear. Just make sure you’re dressed warm and dry!
- Check the weather before you go. We got lucky with the warm weather, but our friends who went during freezing temps said it could be miserable. Regardless, it’s always good to pack layers. You will be colder when sitting around and warm once you start climbing.
- If you rock climb, you can forget about the technique because ice climbing is so different! You want to stay close to the wall with rock climbing, but with ice climbing, you’re constantly sticking your butt away from the wall. You also make your own handholds and footholds and can climb anywhere. The main similarity we can think of is using the gear and using your feet and leg muscles more than your arms.
Where to Stay
Planning Checklist
- Get comprehensive insurance for your trip.
- Download these helpful language apps.
- Find a great deal on Jasper hotels.
- Arrange a rental car for your trip.
- Book a tour for your visit.
- Get airport lounge access.
- Buy a travel charger to keep your devices charged.
- Get a new backpack for your trip.
- Buy a Banff travel guide.
- Pack the appropriate shoes for your trip.
- Don’t forget your in-flight essentials.
Do you want to try ice climbing? Where would you do it?
Did you enjoy this post? Pin it for later
SEE More Climbing Destinations + Tips
⟡⟡⟡⟡⟡
“Discovery consists not of seeking new lands but in seeing with new eyes” – M. Proust

Esther + Jacob
Esther and Jacob are the founders of Local Adventurer, one of the top 5 travel blogs in the US. They believe that adventure can be found near and far and hope to inspire others to explore locally. They explore a new city in depth every year and currently base themselves in Las Vegas.
Follow on Instagram (E + J), YouTube, TikTok, and Pinterest.