
This trip was made possible in partnership with OneSeed Expeditions, Arc’teryx, Feathered Friends, Mountain Hardwear, REI, Osprey, Danner, Columbia, Sea to Summit, Platypus, Exped, Nikwax, and B&H. As always, all opinions are our own. Thank you for supporting the brands that make Local Adventurer possible.
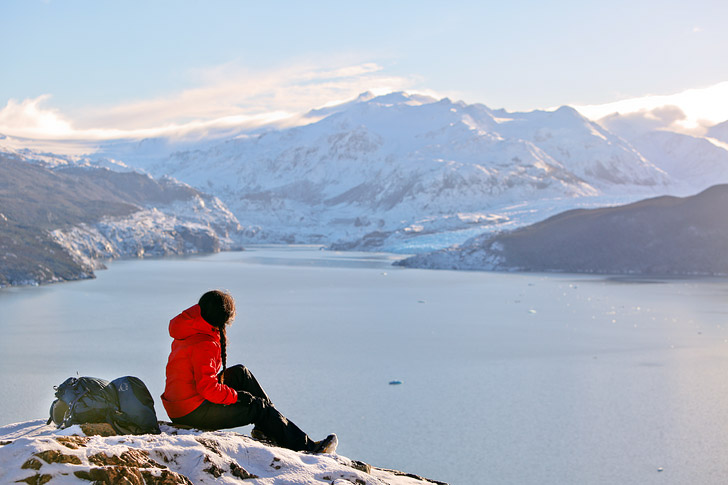
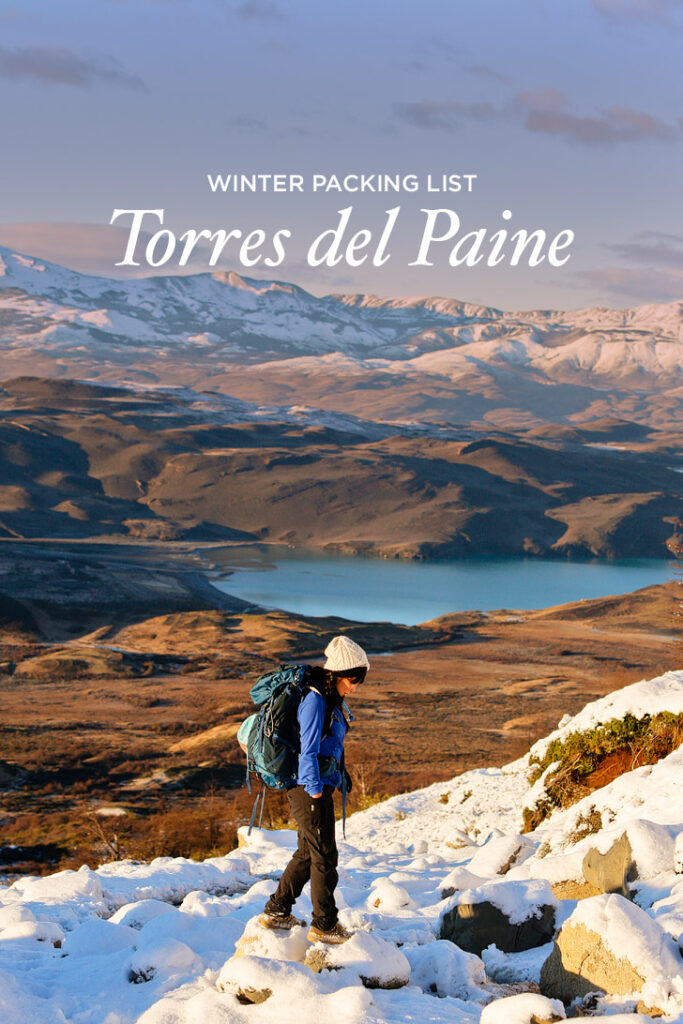
 Pin Overall, we were much better prepared for this hike than we were for the Inca Trail, but we always learn a few new lessons on every hike. Hopefully, they will help you for your hike.
TORRES DEL PAINE PATAGONIA PACKING LIST - WINTER EDITION
WINTER VERSUS SUMMER
Neither of us love the winter. Sure, snow is pretty, and we like to visit snowy landscapes on rare occasions, but the best part is we get to leave and return to mild and comfortable temperatures. We were intimidated by the idea of winter Patagonia, but we were even more determined to visit the park without the crowds.
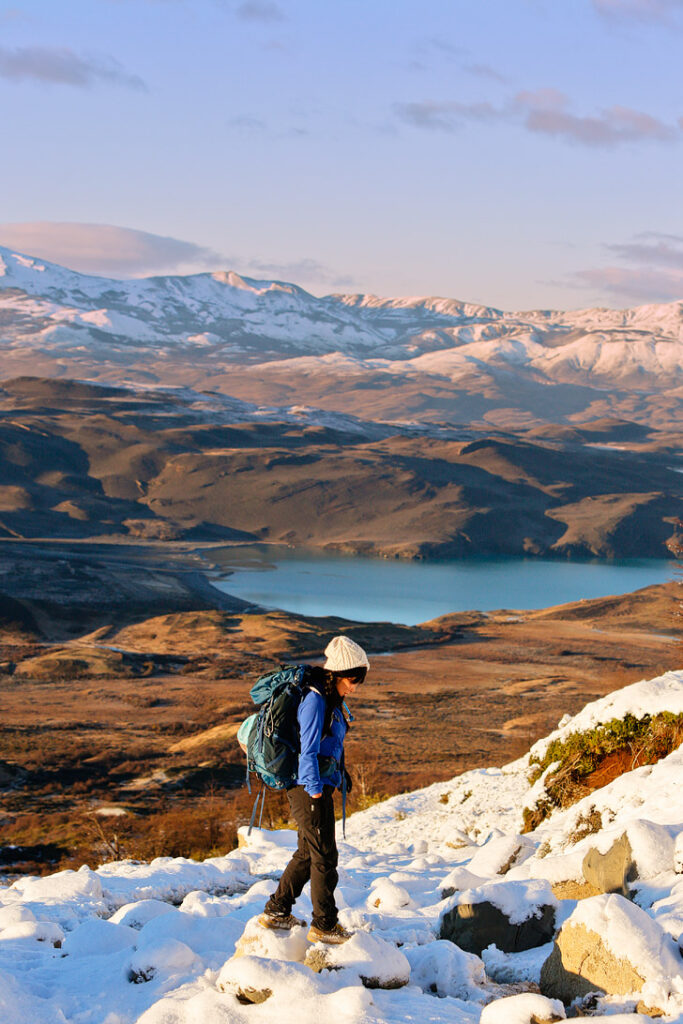
Now that we’re back from the trip, we’re so relieved that we went in the winter! We hiked to the Granite Towers on the first day, and in the summer, there are usually 800-1000 people on that trail each day. We only saw 1 other hiker and their guide when we were on the trail. How amazing is that? Plus, the winter wasn’t as painful as we anticipated.
THINGS TO KEEP IN MIND
- Every ounce counts, so decide what you absolutely need and what are your luxuries. Each new hiking trip, we realize there’s something new we could have done without, but I also find that there are some non-negotiable luxuries for me too.
- In the winter, you are required to have a guide, and not as many companies offer winter hikes.
- Will you have a porter? The OneSeed Winter Patagonia hike does not include porters so you are responsible for carrying all of your personal gear. Don’t overpack!
- Where will you be staying before and after the hike? We stayed at the same hostel in Puerto Natales before and after our hike. If you stay at the same spot, you can leave a fresh set of clothes for your travels back.
- Bag weight limits (50 lbs – but double check with your airline). If you are traveling on domestic flights, which you most likely will, you usually can’t carry on a big backpack. We were able to carry on our bags from Atlanta to Santiago but had to check them for Santiago to Punta Arenas. A small bag was helpful to hold onto our fragile camera gear.
- Weather is constantly changing! It’s common to experience all four seasons in one day during any season, so you want to be prepared for the worst. To check current weather, visit these sites: Paine Grande & Punta Arenas.
 Pin
Pin Pin
PinHiking Gear - Patagonia Packing List
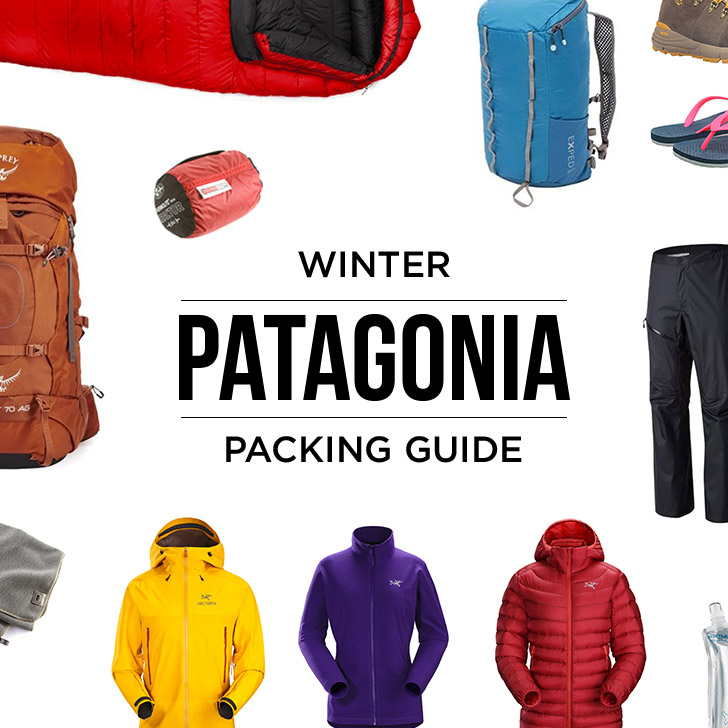
This is a list of what our guide company recommended plus some of our own additions.
- Backpack: Find a backpack that fits correctly since this can make or break your trip (and back 😜). Every body type is different, and the easiest way to find what fits you best is to go to REI and try them all on. We retired our old Osprey Packs and on this trip, they sent us the new Osprey Aether 70 AG Pack (His) and Osprey Ace 50 Pack (Hers). Thanks, Osprey! We bought Osprey packs for our first backpacking trip, and we’ve always stuck with them since we love their fit and support. The top portion of the Aether 70 converts to a daypack, which really came in handy. The Ace 50 youth pack is the only pack that happens to fit my smaller frame.
- Pack Rain Cover: Double check if your backpack comes with a rain cover, if not you can purchase one of these. Most Osprey packs include one, but the Osprey Aether 70 AG Pack doesn’t. Jacob just assumed before leaving for the trip, and fortunately for him, it didn’t rain.
- Down Jacket: You’ll want a down jacket whenever you stop on the trail, so you don’t lose your body heat. For cold nights, you’ll want a good down jacket as an extra layer.
- Fleece Jacket: A good fleece jacket is a really important insulating layer. I used this fleece and wore it on top of a tank top for 90% of the hike. It gets warm when you’re on the move. Jacob didn’t bring one and brought two base layers instead, but regretted that decision.
- Hiking Pants: We each brought one pair of hiking pants and wore them for the entire hike. I had these Columbia convertible pants but also brought one pair of light pants for the travel days. Jacob had Mountain Hardwear Pants which he loved.
- Waterproof Jacket: It hailed and snowed during our trip but it didn’t rain. The waterproof jackets were important to keep us dry and we even threw them on when it got windy as an additional protective layer. Our new Arc’teryx Beta SL Jackets were perfect for this! PRO TIP: You can extend the life of your rain gear by washing them with Nikwax.
- Rain Pants: This is really important for rain or snow! They also give you an extra layer of protection from the wind. We both had the Mountain Hardwear Exponent Pants, which worked wonderfully. We opted for the most waterproof but not as breathable option. PRO TIP: Try on your pants beforehand, so you can be efficient if it suddenly starts raining. Our pants were more fitted than others. Because of that, we didn’t realize that we needed to take our shoes off just to put them on until we were on the trail. An alternative would be wearing baggier rain pants or ones with a zipper all the way up the legs.
- Synthetic Long Underwear: Good base layers are great for hike days but also make nice pajamas at the lodge. Our favorite baselayers are from REI, Arc’teryx, and Patagonia. We brought one set for hiking and one set for the lodge.
- Synthetic T-Shirt: The one downside to tank tops is that backpacks are not comfortable if that’s the only thing you wear, but in the winter, you’ll always have at least one extra layer. We brought 2 for hiking and 1 for the lodge.
- Quick Dry Underwear: I brought women’s Exofficio underwear for each day of the week, but Jacob brought 3 of the men’s version that he could wash or wear inside out for the whole week.
- Wool or Synthetic Hat: A hat will definitely stay on for the majority of the hike. Esther has a Columbia Omni Heat Beanie and Jacob had the Mountain Hardwear Dome Perignon Beanie, which completely blocks out the wind. PRO TIP: Leave your caps at home. We both brought trucker caps that they kept blowing off because it was so windy. They ended up attached to our packs for most of the hike.
- Buff or Balaclava: A buff or balaclava pairs perfectly with a beanie. Esther actually used her balaclava and sometimes didn’t even bother with a beanie. She was able to wear it just as a hat or neck cover. Jacob used his buff in a similar way. It was good for covering up his neck and ears when he didn’t have the hat on but could also cover his whole face.
- Glove Liners: Multiple gloves are always a good option. Liners are great because they still give you dexterity and warmth. We wore ours for most of the hike and threw on our waterproof ski gloves when it got really cold or wet. Our gloves weren’t technically liners, but they did fit into our ski gloves.
- Ski Gloves: Whether it’s rain or snow, you’ll most likely run into some sort of wet and cold weather. Ski gloves will keep your hands warm and dry.
- Waterproof Hiking Boots: Hiking 50 miles over 4 days is no joke. Find ones that fit well and are broken in. You will be spending a lot of time in them. I can’t stress enough, don’t take brand new boots on the hike! We both have loved our Danner Mountain 600 hiking boots. PRO TIP: If your shoes are well worn like ours were, be sure to re-waterproof your shoes with Nikwax. Our shoes are waterproof but well worn, so our socks still got damp on the last day. It didn’t help that they were covered in snow for hours at a time.
- Yak Trax: Since the trails are icy in parts, Yak Trax will be needed. A couple of people in our group had the coils that didn’t work well. We were happy with the Diamond Grip Traction system. They’re also more durable and great in the Torres del Paine terrain switching from ice, snow, rock, and mud.
- Gaiters: This wasn’t on our original packing list, but the one thing we highly recommend. On the first day, we hiked through thigh-high snow. Our socks were wet since snow got into our shoes. Wet socks are never fun to hike in. The alternative is to bring extra socks.
- Nylon-Wool Blend Socks: When we first started packing, we packed a new pair of socks for each day but quickly realized how much space they take up. Our friend who hikes a lot told us just to bring 2. One for hiking, and one for backup and use at the lodge. It grossed me out, but after feeling the weight of my pack I took her advice and it worked out. We aired out the hiking ones at night and it would be good to go the next day. We also had access to water at the lodges, so you can wash and alternate them. Esther also had a couple silk liner socks to decrease risk of blisters and for travel days (no blisters!).
- Sneakers / Flip Flops: They recommend bringing a pair of sneakers of flip flops to use at the lodge while you dry your hiking boots. Esther brought these really light Under Armour Sandals, and Jacob decided to just use his down booties. The flip flops were also great for the showers.
- Booties: For those of you who get cold feet, these down booties are game changers! You can wear them around the lodge, then take off the outer layer to sleep with them. These shoe bags are the perfect way to pack them.
- Sleeping Bag w/ 0°F Rating: This will prepare you for the worst. We actually got decent weather during our trip, but we heard stories of freezing nights in the lodge. It gets really cold at night since there is no heat. You are protected from the wind, but there isn’t much insulation in the building. I found the Feathered Friends Murre Ex 0 Degree Bag, which was perfect for a petite girl like me who always has trouble warming up my bag. Jacob had the Mountain Hardwear Phantom Torch 3 Degree Bag and liner which worked well for this trip. PRO TIP: If you get really cold or have a sleeping bag that isn’t quite rated cold enough, you can bring a Sea to Summit Liner that can add up to 25 degrees to your bag instead of buying a new bag.
- Day Pack: Three out of the four days of hiking, you’ll have a chance to leave the bulk of your items at a lodge or in a van. A daypack is a great option to lighten your load. Jacob’s backpack had the removable day pack and Esther brought her Exped day pack that packs really small. Because we were carrying heavy DSLRs and lenses, we ended up using our main packs because they provided more support. We used our day packs during our domestic flights since we had to check in our big backpacks. If you don’t bring a heavy camera gear, the day packs will be best.
- Water Bladder: There are a few places to fill up at streams along the trail, and a bladder still helps you have 1-2 liters so you drink often while hiking. Two of the people in our group had insulated hydro flasks instead, but since we were hiking at a quicker pace, they didn’t have time to take them out to drink as often. It’s important to have easy access to your water to stay hydrated. We love these Platypus Big Zip ones because they are easy to fill and clean. PRO TIP: Empty your bladder and hose each night, otherwise the water might freeze.
- Water Bottle (our favorites): The downside to the bladder is that they are more cumbersome to take out and fill up at a stream. We always carry a Platypus Softbottles when we travel because they weigh next to nothing when empty, and you can roll them up. Our guide had an insulated bottle for hot tea to warm up on the trail, which was nice, but not worth the extra weight for us.
- Headlamp: Some of the long days may require you to hike in the dark. The Paine Grande Refugio also has lights out around 10 PM, so you’ll need a light if you need to go to the bathroom in the middle of the night.
- Sunglasses: Protect your eyes when it’s sunny out! The snow can be blinding.
- Quick-Dry Towel: The nice thing about this trip is that you’ll have access to showers (although sometimes cold). I like the cushier travel towels to dry my long hair, and Jacob prefers the light version to save space and weight.
- Personal Toiletries and Meds: Don’t overpack your toiletries and think about the minimum of what you need. These Lewis N Clark Travel Pouches have been our go to toiletry bags. PRO TIP: We had Dr. Bronners in a GoToob for places that didn’t have soap or shampoo. You can also use it to wash clothes!
- Ziplock Bags: We each had one for every day and extras to protect passports/phones. You need them to carry out any garbage or used toilet paper.
- Toilet Paper: You need to bring your own toilet paper in case you need to use the restroom on the trail. We just rolled up some toilet paper from home and put them in a ziplock bag.
- Waterproof Ditty Bag: We each had a Sea to Summit Ultra-Sil Nano Dry Sac. They helped compress clothes for packing but also kept anything important dry on the trail.
- Trekking Poles: REI Flash Carbon Trekking Poles worked great, were lightweight, and fit in our packs. Keep in mind that your trekking poles must fit inside your pack for domestic flights. Make sure they can support both your weight plus your backpack. Jacob also got the women’s trekking poles because they were lighter and smaller, but they did collapse on him one time during the hike. Regardless he still preferred having the lighter, smaller ones vs ones that are sturdier and heavier. PRO TIP: Do not loop the trekking poles on your wrists when you are hiking downhill. You want to be able to let go of them if you slip or fall rather than having them stuck to you.
 Pin
PinCamera Gear
This is still an ongoing debate for us. Should we go mirrorless or iPhone only? Or stick to the DSLRs that we love. If we bring the DSLRs, we regret having to carry the weight, but if we don’t, we regret not having the same quality photos. There were many points on the trail where I wanted to throw my camera, but we did survive without breaking anything. Whether the extra weight is worth the photos is completely up to you, but here’s what we brought as our setup. Shop our camera bag here.
- Camera: We brought our Canon 5D for photos and Sony RX100 for video.
- Camera Straps: Your camera is only good if it’s easily accessible. If it’s sitting in your backpack, you probably won’t shoot much.
- Lenses: We went with our go-to set up of a 35mm for wide shots and 70-200mm for wildlife or any zoomed shots.
- Tripod: We lugged our tripod around every day but didn’t use it much mostly because we never had enough time. We didn’t get a chance to stop much because the days were shorter. If you go in the summer with longer hours or if you’re a fast hiker (we’re average), I would recommend a tripod since you’ll have plenty of time to shoot. For anyone else, don’t bother.
- Batteries: Always prepare for the worst-case scenario. We were fortunate enough to have enough power to recharge every day, but we brought one battery for each day we were there just in case. PRO TIP: Batteries lose their charge in cold weather. Always keep them close to your core when hiking and keep them in your sleeping bag at night.
- Charger: Bring a charger just in case you have power. We also brought a solar charger but didn’t need it since we had power at the Refugio / lodge.
- Outlet Adapter: A European adapter will work in most cases. We had no issues with our adapters but heard that they sometimes don’t line up.
Optional Items / Luxuries
- Reading Material: The days are shorter (roughly 9 AM to 6 PM) so there’s a lot of down time. I wished I had my Kindle on some days, but I wasn’t dying of boredom. The Refugio had wifi, but it wasn’t cheap, and it was only fast enough to check emails and send messages. You can also only use it when the power is on from 5 – 10 PM.
- Hotel Reservations for Extended Time: Have printed or digital copies (available offline) for any reservations you have.
- Guidebooks: A guidebook is always helpful if you plan on extending your time in the country.
- Synthetic Shorts: Some people prefer to have shorts in the lodge. Neither of us brought any. We mostly wore our tights and threw on hiking pants when we had to go to the public spaces.
- Snacks: We packed multiple snacks but didn’t need most of them with our guided hike. OneSeed provided us with a sandwich, fruit, cereal bar, chocolate, and trail mix/nuts each day. This was plenty to hold us over. Just in case you need a couple of extra snacks, we really liked our Stinger Waffles and Stinger Energy Chews. They were easy to eat and carry in our hip zippers.
- Hand Warmers: We brought a couple packs each and used them as a last resort. You can do without, but on the days my fingers really hurt, it was nice to have the option to throw into your gloves. My kid’s mountain gloves had zipper pockets made for them. No one else used them.
- Baby Wipes: This is usually a luxury on the trail I can’t do without. On this trip, we happened to have warm, running water, but there was one day the water was frigid cold, and everyone else took a baby wipe shower.
Documents and Logistics
- Flight Information: You should always have a copy of your flight info printed or available offline on your phone. You never know when you might need it when you’re traveling overseas.
- Passport: Your passport needs to be valid through the end of the trip. Be sure to carry this and your entry receipt with you at all times of the trip. If you plan on visiting other countries, check what they require.
- Medical Insurance Card: It’s always a good idea to have travel insurance. Be sure to have a copy of your policy information. OneSeed includes travel insurance with your booking.
- Cash: You need to tip your guides with cash. You can also use it for souvenirs and incidental costs. Also, be sure to bring crisp bills, since some exchange places won’t accept wrinkled or torn bills. Here is a good guideline for tipping (Guide: $6-8 per day, Assistant Guide: $2-5 per day, Cook/Mulero/Camp Assistant: $1-3 per day).
Anything else you would add to the essential Patagonia packing list? Is the W Circuit on your bucket list? Or what’s an upcoming hike you’re excited about?
Did you enjoy this post? Pin it for later
 Pin
Pin Pin
Pin Pin
Pin Pin
Pin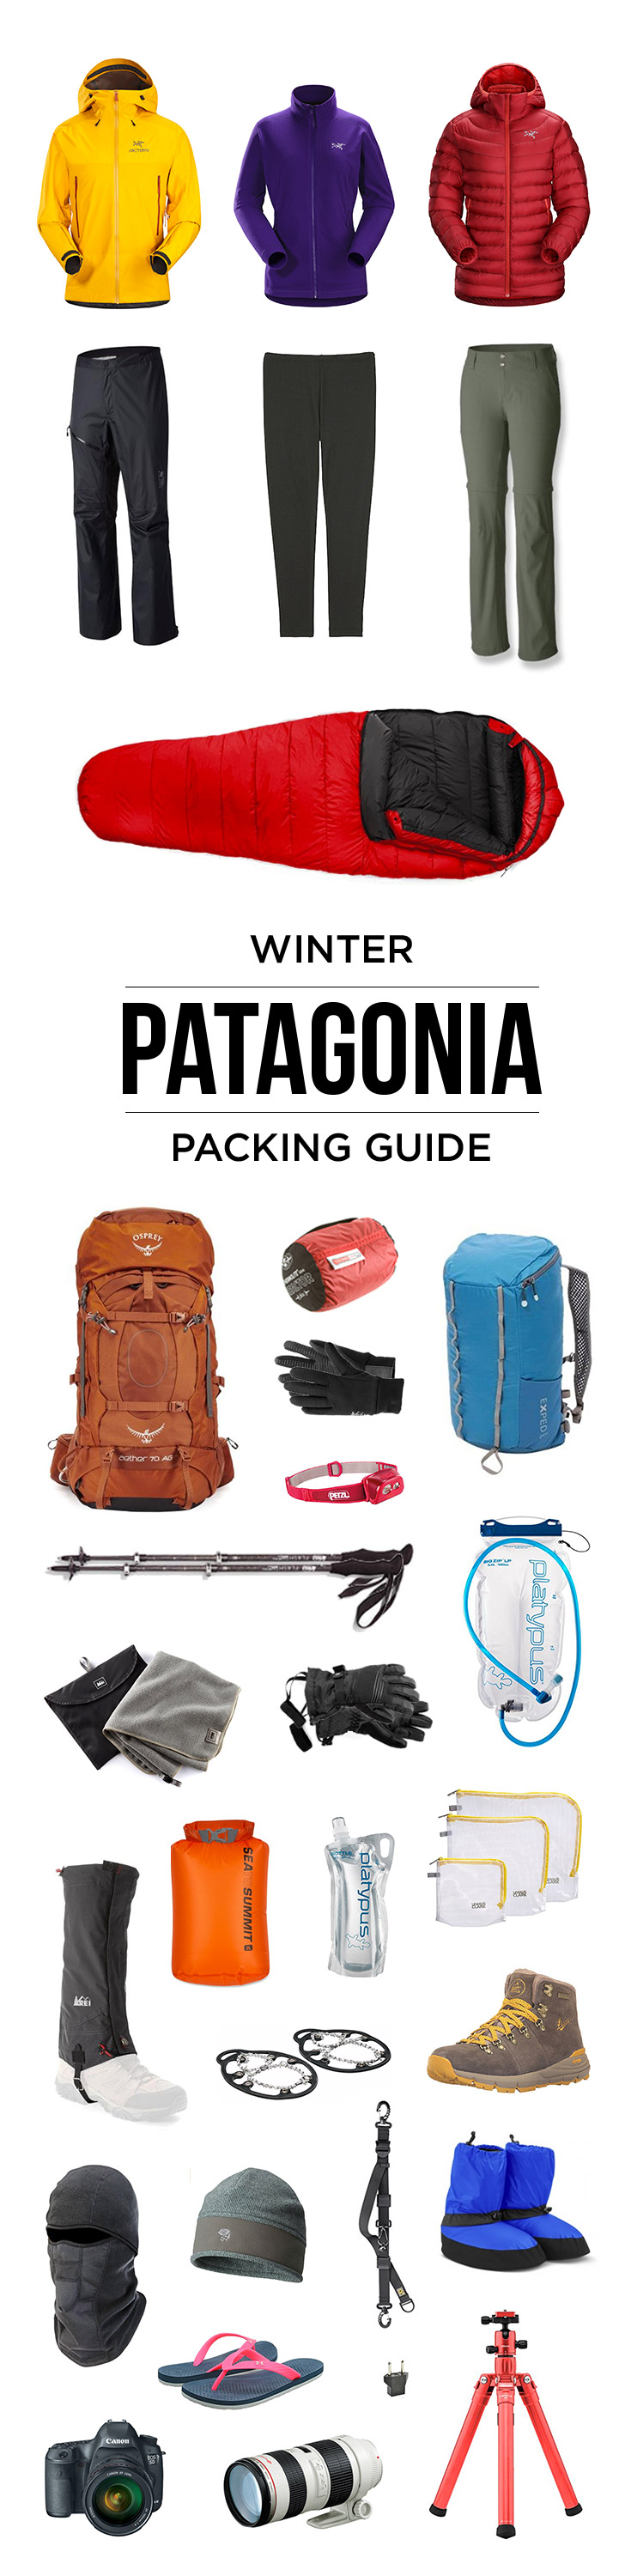 Pin
Pin Pin
PinSEE MORE PACKING GUIDES
⟡⟡⟡⟡⟡
BACKPACKING THE NARROWS PACKING LIST
WHAT TO PACK FOR THE INCA TRAIL HIKE
ULTIMATE HAVASUPAI PACKING LIST
WHAT TO PACK FOR THE HALF DOME HIKE
“Discovery consists not of seeking new lands but in seeing with new eyes” – M. Proust
 Pin
PinEsther + Jacob
Esther and Jacob are the founders of Local Adventurer, which is one of the top 5 travel blogs in the US. They believe that adventure can be found both near and far and hope to inspire others to explore locally. They explore a new city in depth every year and currently base themselves in Las Vegas.
![]()
![]()
![]()
![]()
![]()
![]()