When I started our blog, it was initially an outlet to share photos of our adventures on the west coast. I had closed my wedding and portrait photography business of 8 years, and we moved to LA to pursue Jacob’s budding youtube career. While Jacob kept busy with his work responsibilities, I felt like I lost a part of my identity when I stopped shooting. Out of that time of being lost, this blog was born.
A big thank you to Travelade for sponsoring this post. All opinions are always our own. This post may contain affiliate links, where we receive a small commission on sales of the products that are linked at no additional cost to you. Read our full disclosure for more info. Thank you for supporting the brands that make Local Adventurer possible.
Last Updated: July 26, 2022
After I decided to start blogging more regularly, I began noticing other bloggers that were making it a career. Seriously? People get paid to travel the world?
I’ve always loved the idea of making what you love into a business. That’s initially why I started our photography business, but blogging felt oddly different and a lot more personal. It took me a while to change my mindset and think of the blog as a business too. Soon enough, I discovered a new world of opportunities and also a community of bloggers working toward the same dream of blogging full-time.
5 Easy Steps on How to Start a Blog
1. Pick a Topic to Blog About
Picking your blog niche is one of the most important decisions you will make. It guides you in shaping your content and your audience. You can make small changes along the way, but once you’ve grown an audience, you want to avoid making a complete 180 in the type of content you write. I started off writing about a lot of different topics, because I’m a dabbler and love trying a little bit of everything. Some topics I wrote about in the past were travel, recipes, diy projects, personal goals, and more. As you can see I was all over the place.
I know some say you should blog what you want, and your audience will follow you for who you are. In my experience, I only saw real growth when I started narrowing my focus on travel. If you are already a celebrity or trying to grow yourself as an online personality, that’s a different story. If you’re blog is more about the content, it’s beneficial to have a niche.
Pro Tip: Write down everything you’re interested in and see if there are specific categories that you are an expert on. Are people constantly asking you for advice about something? Also, consider if you have a unique perspective that you can offer.
2. Choose a Name and Domain
Based on your niche, pick a name for your blog. This is very important because it’s the first thing people see. It needs to be memorable, easy to spell, and give people an idea of what your blog is about. You want to be specific to your niche but also careful not to pigeonhole yourself (i.e. If you name your blog TravelingtheSouth, what happens when you want to move to a different part of the US or world or you want to expand your content to other areas?).
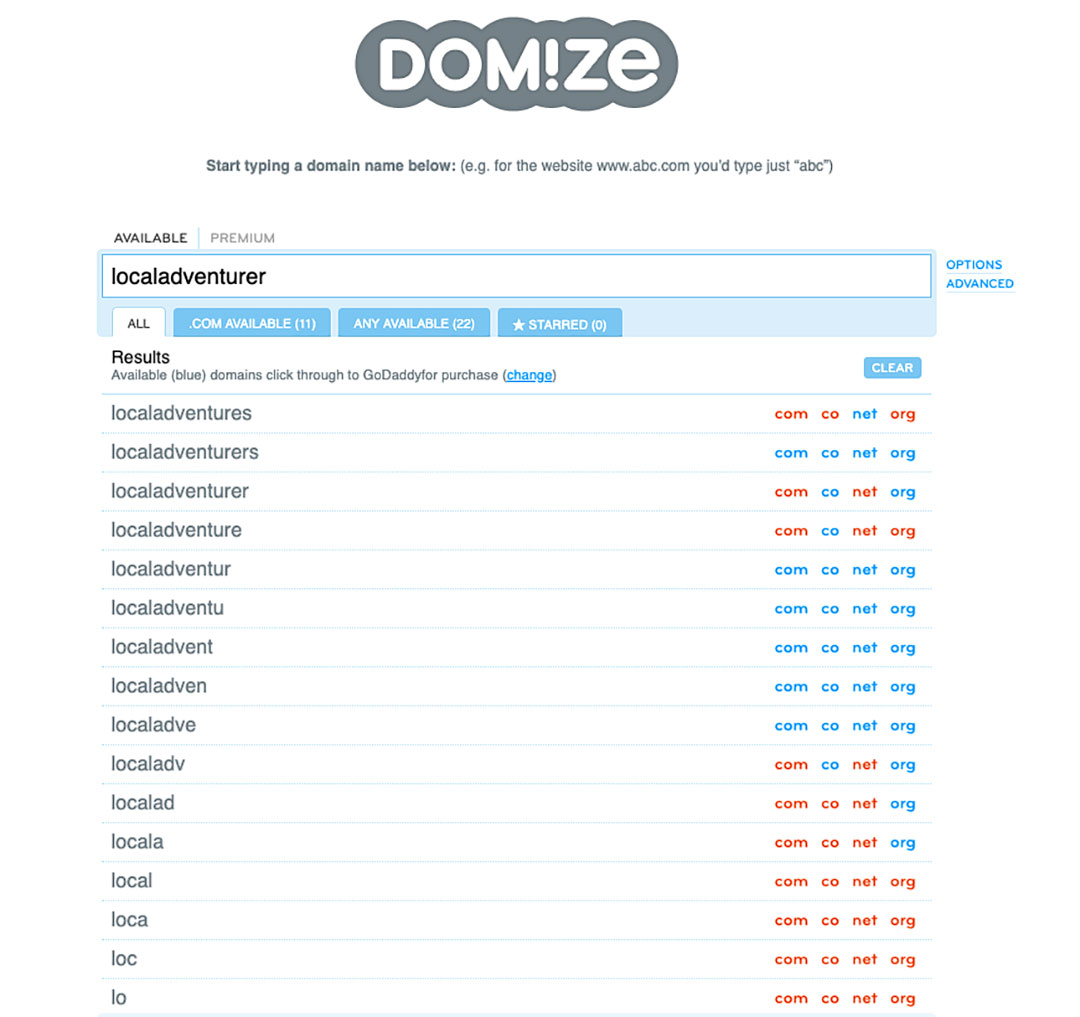
Pro Tip: Do some research on the top sites and blogs in your particular niche. Don’t use similar or any common words since it makes it harder to stand apart (unless you plan on trying to piggyback off of someone else’s success). Double-check to see if your potential domain name is available at domize.com. It’s the easiest way to see all your options, but then it takes you to other sites like GoDaddy, Network Solutions, etc for purchasing the domain.
3. Register Your Domain and Choose Web Hosting
At this point you can go one of two routes: self-hosting or a free alternative. If you’re looking to start a blog as a hobby, get a free domain. The unfortunate part of this is that the name does not look as good (i.e. yourblogname.wordpress.com, yourblogname.tumblr.com). In addition to that, you’ll have a lot more limitations on design and plugins when you don’t own the blog. For those reasons, I highly recommend self-hosting. Now, what does that mean?
There are two components:
- The Domain is basically the URL. For example, localadventurer.com is the domain.
- Hosting is renting space on the internet. You use a company that will store all your information on their hard-drives connected to the internet.
For your domain, you can purchase it at a number of sites. Here are a few that we’ve tried:
- Google Domains – I like to look at my options through DOMIZE, but once I find a domain name I like, we now mainly use Google Domains to make purchases.
- GoDaddy – This current site is still through GoDaddy, but all the newer ones have been through Google. If the price is the same, it doesn’t make much of a difference. It’s just a matter of preference. Just go with the cheaper one.
Pro Tip: Before purchasing your domain, search google to see if they are offering any coupons or deals.
There are a lot of options for hosting as well! Here are some popular options including ones we’ve tried:
Pro Tip: If you use this link for Bluehost, you’ll pay only $3.95 a month rather than $7.99. A perfect way to start! Just hit get started and you’ll see different plans. If you’re just starting out, the cheapest plan is all you need.
4. Install WordPress
Although there are other alternatives, WordPress is by far one of the biggest platforms and the one that we use. Besides being huge, it’s easy to set up, free to use, and there are tons of themes and layout options. If you are using BlueHost as your hosting, they have easy WordPress set up wizard. Just follow their instructions, and if you have any trouble, they have great customer support. I’ve used Blogger in the past but ended up sticking with WordPress. WP FTW!
Sites like Squarespace and Wix make it really easy to put together a pretty site but is very limited in customization. Anyone we know who has used them eventually outgrows those sites and moves over to WordPress, but if you’re looking for a simple site to deal with they are great options.
5. Design the Blog
This is the fun part but can also be daunting. There are thousands upon thousands of free WordPress themes out there. As you’re starting off, just pick one where you like the general look and start familiarizing yourself with how everything works. They are limited but having fewer options will make it less confusing at the beginning.
If you’re signing up with BlueHost, it will be the next step. Again, don’t overthink which theme you use because you can change it whenever you need to. Just pick one and finish the prompts to set up the rest of the site.
Once you have a better idea of what you need, you can take the next step and find a paid theme. Most of the time, these will give you much more flexibility in your design and customization. Each has its own pros and cons, so be sure to do your research before purchasing anything.
If you can’t find a theme out there that meets all your needs or just want something that sets you apart from what’s already out there, hire someone to design and build you a custom blog. We used a paid theme that we customized for a while until we needed more from it. In our 6th year of blogging, we finally hired someone to help build a custom site to meet our needs. If you need a referral, send us a note to [email protected].
If you want to get a head start and focus on creating content, check out the bonus info below about Blog Setup Matters.
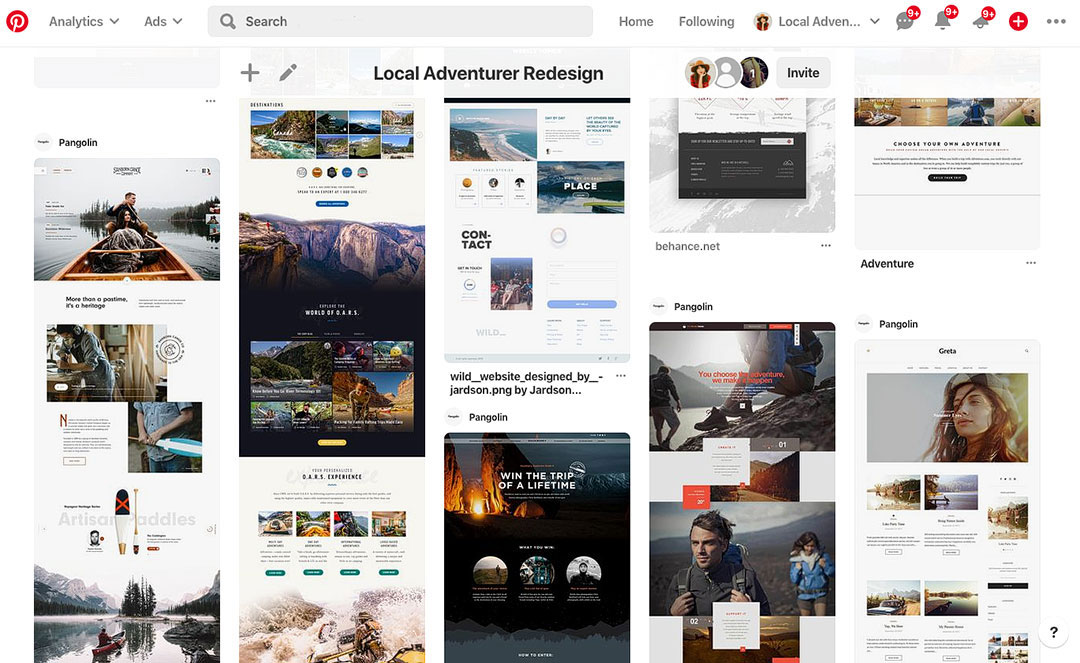
Pro Tip: A great way to gather inspiration is to create a Pinterest board to pin all the websites that inspire you. If you have a web or graphic designer, add them to your board.
BONUS: Outsource Your Design
If designing a blog seems a bit daunting, you can always outsource the whole process to get yourself up and running faster and smarter. We recently used Blog Setup Matters to set up a blog for Josh and Macy. Check it out here: Set on High.
The experience was really simple and really didn’t require much from my end! I just provided info of what I needed, they asked me what I would need, and they immediately worked on it. There were things that they implemented that I didn’t even know I needed. There was a nice selection of themes to choose from, and finally, they answered any questions I might have until I felt comfortable. – Josh Fu
Starting a blog is easy. Keeping up with it takes a lot of work. If you’re looking for an easy way to share your travel tips, there are other options out there like Travelade.
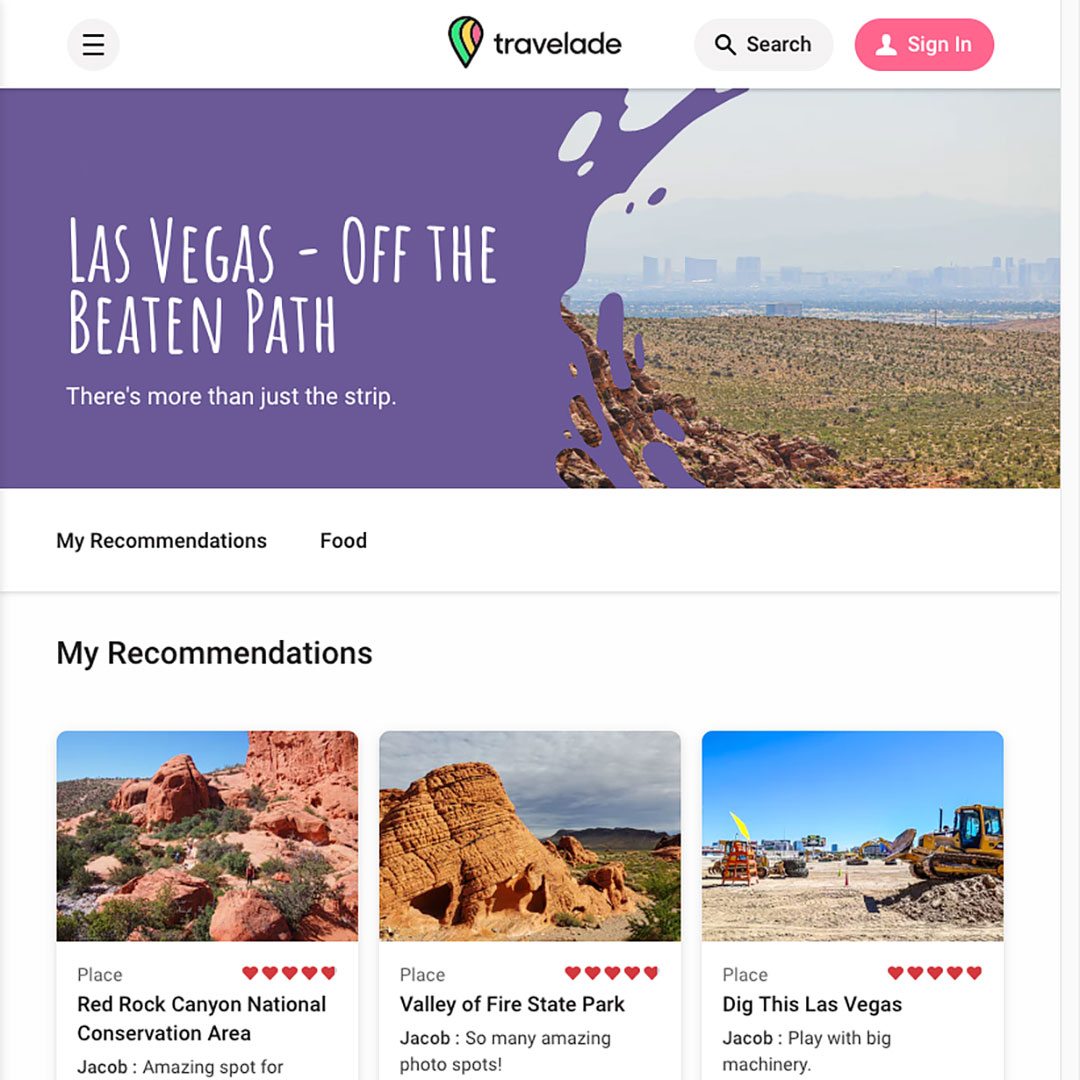
Travelade has built a site where you can easily create travel guides for any destination in the world. You can customize your theme, create different collections, easily add items to each collection, and more. On top of that, each of the items automatically includes address info, website, rating, reviews, and photos. After creating a guide, you share it with your audience and you earn a commission for bookings through your guides.
It’s a great option if you have a following (i.e. on YouTube or Instagram) and want to just point people to a guide you created without building your own site. It’s also a great option if you’re just looking to share recommendations with friends and family.
Check out this Wanderguide that I made in 5 minutes. You can obviously go into way more details on your tips, but it’s amazing how quick the whole process is. Just to give you a comparison, it usually takes us at least 20 hours to do a full blog post.
Favorite WordPress Plugins
- JQuery Pin it Button for Images – can customize your own pin it button.
- Pretty Links – you can rename links to make them all look pretty and clean.
- Yoast – Helps you with SEO to show up better in search engines. There is a free version which works great. We only recently started paying for the premium version so to look at multiple keywords per post, which saves time but isn’t necessary when you’re starting out.
- WordPress Editorial Calendar – so you can see scheduled posts in a calendar format.
- Yet Another Related Posts Plugin – It shows related posts at the bottom of your post, and you can choose what you want to feature.
- Tailwind for scheduling Pinterest (Get $15 when you sign up with our link). I use the Unlimited Smart Schedule to save on time. You can manually pin, which I did for the first year, but we got to the point where the time I put in to manually pin wasn’t worth it.
- Grum.co for scheduling Instagram. We do this for LocalAdventurer, but for our personal accounts, we save drafts in Instagram.
- Hootsuite for scheduling twitter and facebook.
- ConvertKit for mailing lists.
More Resources
So that’s it! This is definitely just the tip of the iceberg, but it’s a good start to get your blog up and running.
Last but not least, we want to tell you how much we appreciate you reading our posts, commenting, and supporting us via any affiliate links. This blog has been a labor of love, and none of this would have been possible without you. We wish you the best in starting your own blog, and let us know if you have any questions.
Have you considered starting a blog? What other information would help you as you start yours?
SEE MORE ON HOW TO BLOG
⟡⟡⟡⟡⟡
“Discovery consists not of seeking new lands but in seeing with new eyes” – M. Proust
Esther + Jacob
Esther and Jacob are the founders of Local Adventurer, which is one of the top 5 travel blogs in the US. They believe that adventure can be found both near and far and hope to inspire others to explore locally. They explore a new city in depth every year and currently base themselves in Las Vegas.




Apps We Use for Social Media