No matter what kind of camera gear you use, you can still take beautiful photos if you have a basic understanding of lighting. We love putting together these guides, because often times there was a learning curve involved for us. I know there are tons of photography guides out there, but we hope that this one breaks it down simple enough for a beginner to use!
When it comes to product shots, we prefer taking lifestyle photos where you can see the products in the environment that we use them in. There are also times, however, that we need our products photographed against a clean background as well. It comes in especially handy if you plan on putting together graphics or packing guides.
Note: There are some companies that allow you to use their images as long as you link back to them and are helping them generate revenue, but this is not always the case. It may seem easier to cut corners and pull images from sites (I know I have in the past), but it’s good to have your own photos so you don’t get sued for using copyrighted material. Also, as a former photographer who used to make a sole living off of photography, it’s never fun seeing your work used somewhere without your permission, or worse without being properly credited. At the very least, please ask for permission or look up the rules!
QUICK AND EASY GUIDE ON HOW TO TAKE PRODUCT PHOTOS:
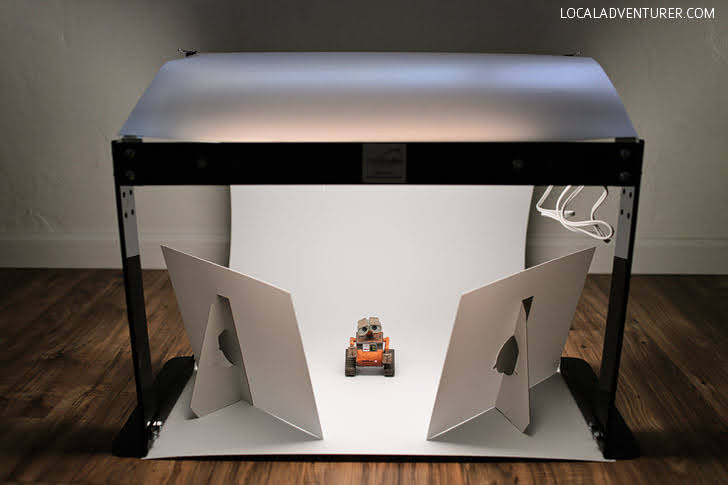
1. Get a White Background & Studio Lights.
Our beauty blogger / youtuber friend has been using the MyStudio MS20 and recommended it to us, so we decided to check it out! After we bought the MS20, we later learned there was a more packable version, so we decided to compare the two.
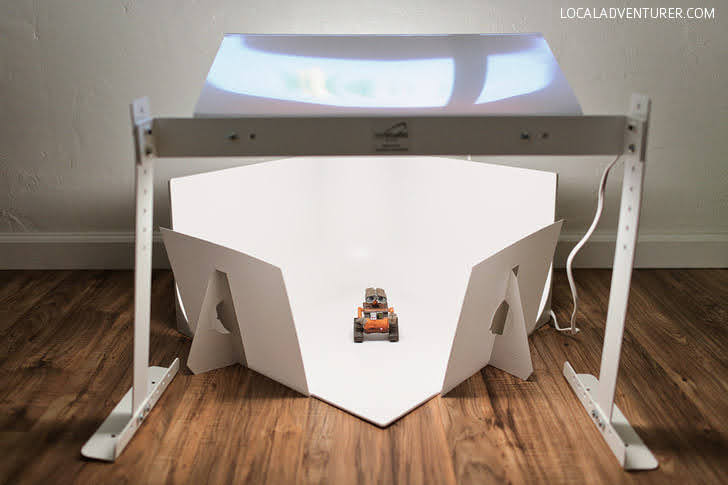
- Cost: $179.00
- 20 x 20 x 12-inch seamless cyclorama infinity background
- 5000K color-corrected “daylight” fluorescent lighting ensures perfect color on your subject
- Shipping Weight: 9 pounds
What We Like:
- All curved corners so that the background is seamless.
- 90 degree corner gives you plenty of angles to shoot.
- Easy set up (takes about 15 mins) and has a good quality, solid build.
- Background is washable (great for food styling).
What We Don’t Like:
- No way to break down the background so you need dedicated space or storage space. We had to get really creative with how to store it in our tiny apartment.
- Only one option as a background color.
- Lighting could be improved (not always the most even light).
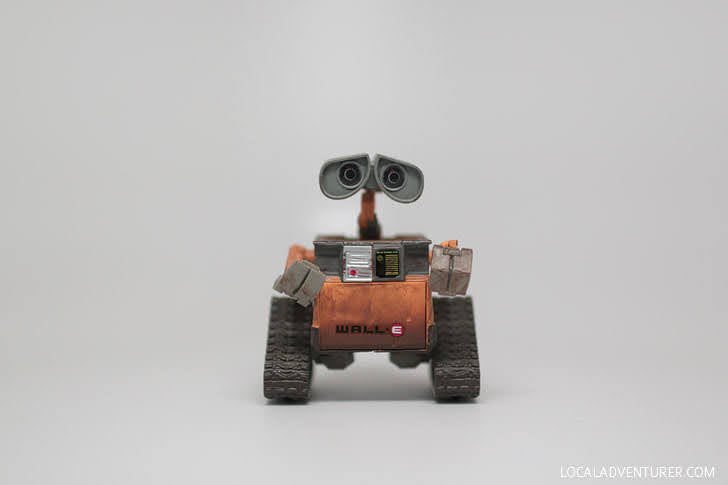
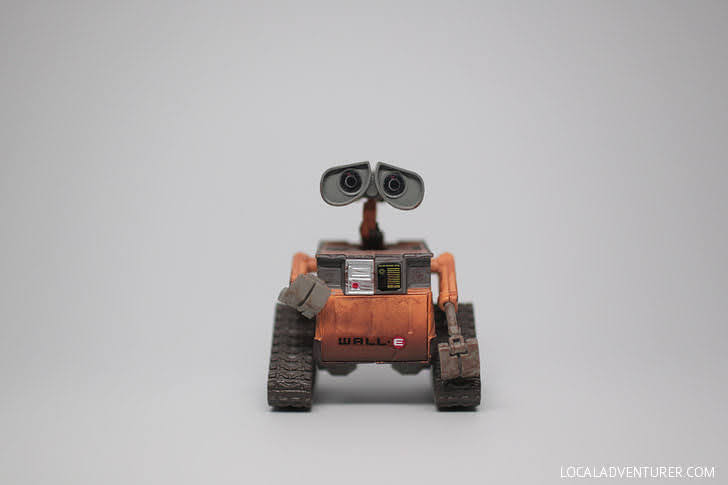
Photos with the white & gray background straight out of camera.

- Cost: $142.50 (for the bundle with 5 additional background colors)
- 24-inch wide seamless white background provides a perfect soft, seamless background for photos
- 5000K color-corrected “daylight” fluorescent lighting ensures perfect color on your subject
- Shipping Weight: 5.5 pounds
What We Like:
- Background packs away nicely (just roll it up)
- Multiple background colors
- Background is washable (great for food styling).
What We Don’t Like:
- To pack up the stand, you still have to take it apart (takes ~10-15 min)
- I feel like I might accidentally bend the background when I’m packing and unpacking it
- Limited to shooting straight on since there are no sides to the backdrop. Also, you don’t get the light bouncing back from as many directions = more shadows in the back.
Overall the photos are comparable. If we had more space, we think the MS20 is better, but if you’re moving as much as we do, the PS5 is the way to go! Of course there are much more robust setups, but for the value and for the purposes of our blog, these are great! Hopefully the pros and cons will help you decide which fits your needs best.
2. Turn off all other lights.
This will remove mixed lighting that would otherwise mess up your white balance.
3. Turn off your (on-camera) Flash.
Don’t use it. On camera flash creates the worst lighting for product shots (or any shots :P).
4. Use a Tripod.
I generally hate using tripods unless I absolutely need them, but for product shots, they’re extremely useful if you want to take consistent photos, so you don’t have to spend hours cropping and editing them later. Also, it helps make sure the image is as clear as possible.
5. Set your White Balance.
If you’re a beginner, make sure your setting is on Auto / AWB and not on any other setting. If you’re a little more experienced and know how to change your white balance, turn it to 5000 K (if using the MyStudio kits), so that all the color turns out more consistent.
6. Set your Shutter Speed to at least 1/160 sec.
Make sure your shutter speed is at least 1/160 sec (which will say 160 on your camera) or faster, so your image turns out sharp.
7. Set your Aperture to 5.6 or higher.
If you have a 3D product, which most likely you do, you generally want it all in focus. This is especially true if you are delivering these to a client! (For the purposes of our blog, we prefer to shoot wider open at Aperture f/1.4 – 2.8 unless there are specific details on the back of the product we need in focus.)
8. Set your Focal Point 1/3 of the way in.
If your product is 3D, focus on a point that’s about 1/3 of the way in from the front of your object to ensure you get all your product in focus. (Again, since I was shooting wide open, some of the back is not in focus).
9. Manual Mode
You will ultimately want to learn to shoot in manual mode to have the most control of your shot. We will get into the details of this later, but here are the settings I used for the Wall-E product shots: ISO: 250, Aperture: f/2.5, Shutter: 1/160, White Balance: 5000K.
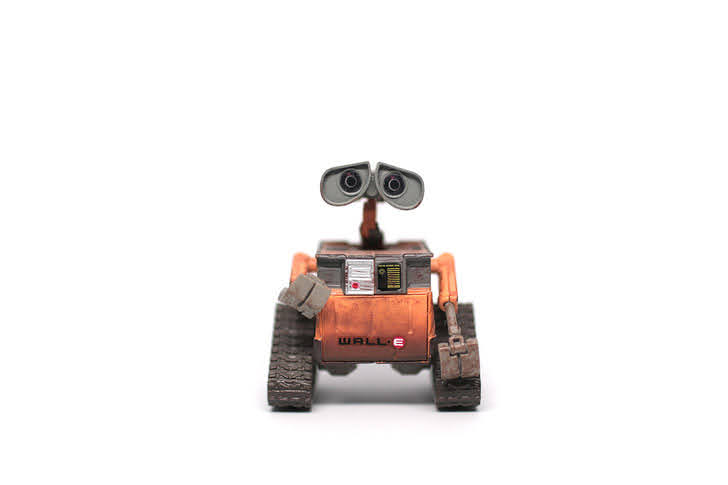
10. Post Production
No matter what you hear, pretty much all professional photos are tweaked or retouched a little. Editing is part of the creative process. In photoshop, we used levels and the white dropper to set the background to white. Then we opened a couple layers, one to bring back details on the subject with the brush tool and the other to clean up the white background, since there is a slight vignette around the corners of the photo. You can see the difference between the raw photo and edited photo below:
I couldn’t for the life of me get my model to smile. What a downer. ;)
MORE: The Best Camera Backpack of All Time
We hope this helps! If you think we should put together a more comprehensive tutorial, let us know in the comments below. We’ve talked about putting together a more extensive e-book on how to shoot photos for a blog. Let us know if that’s something you would be interested in!
If you want to know what other photography gear we use for our blog, check out our Ultimate Camera Gear Guide for Bloggers.
Was this guide helpful?
Is there any part of it that was confusing that you’d like answers to?
Would either of these two studio set ups fit your needs?